Thursday, June 10, 2010

With Star Proof 6 spot color matching is a breeze

By Michael Jahn


Capable of simulating line screens up to 220 lpi, Star Proof is well known for reproducing the sharpest dots possible on an Epson proofer. Star Proof will show the same dot produced by your RIP on your proofer, in just the way they will show once printed on your press. But, did you know that Star Proof can reproduce spot colors with a high degree of accuracy?

The new EPSON Sylus Pro 7900/9900 and WT7900 offer an incredibly larger color gamut than previous plotters. This is due to the additional inks these plotters utilize. Orange and green on the Stylus Pro 7900 and 9900. And white ink on the WT7900. Star Proof 6 takes advantage of this larger color space to accurately reproduce spot colors. Calibrating Star Proof to do this, it's very easy with its optional Packaging Option. Here's how:

With the aid of X-Rite's color port, we create a target made up of all the spot colors that we wish to calibrate. Then we print it and read it using your favorite spectro device - in our case, we used the i1 iSis reader, also from X-Rite.


Then we iterate this process. As we go along, we watch the dE between the actual values and the expected values get smaller and smaller


... and at the end of the process, we have over 1100 spot color definitions with 96% of them under 5 dE. Simple!


Another very cool feature of the Star Proof Packaging option is the ability to add spot colors by using an spot spectrophotometer, like X-Rite's i1. Read it, add it to the spot color list and you are ready to use it.

Think accurate duotones
Have you ever tried to proof a duotone? Star Proof can generate color precise duotones. With Star Proof your press operator can see a proof and know what inks make up a color. Try that with your average proof from a plotter.
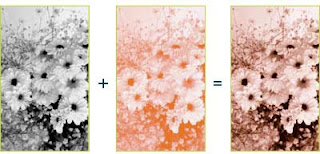


Star Proof also enables you to assign the appropriate opacity to each spot color providing ultimate press simulation.

You may be thinking, why a dot proof?

Printing processes that use coarse screening or different screen ruling in the same job will have a major influence on its visual appreance and color gamut.
Actual dot per dot - right down to rosettes, fine line art, text at just 1pt, and even defects such as moire patterns.

Here's how a typical Star Proof workflow looks like:


Click on the image to see a larger view

Wednesday, June 09, 2010

Introducing File Distribute

Automation is the Holy Grail of a prepress production environment. We all wish we had a system where a file is dropped on a folder and after a few seconds the job could be processed according to the specs we had in mind. Workflow solutions are supposed to help with this. But many times we find a myriad of hot folders, each one with a distinct function. Many hot folder setups vary from others just slightly. Configuring a workflow for a company that has 2 CTP devices, 4 line screen setups, 2 proofing setups, 3 plates sizes, etc. can get complicated very quickly. You get the idea. It gets very complicated, very, very quickly.
Wouldn't it be nice if the workflow could look at the file name and know what to do? Well, Express Workflow is smart and just knows. It's that smart.

Introducing File Distribute

File distribute is a EWF module that routes jobs according to it's file name. All you have to do is add to the PDF file name what you want done to the job and EWF will take care of the rest. Best of all, you get to decide what file naming convention works for best for you. The workflow below uses the File Distribute module three times to get the job done. The first thing it does is route the file to the appropriate PitStop Server module depending if the job is for our digital press, grayscale or color. If the file is color, the next routing module will decide if the job is going on coated or uncoated paper on press. Depending on this the file will get sent to the IS Optimizer module that will apply the right dot gain and the total ink coverage the job should have depending on the paper it will be printed on. The next module routes the job to the proofing RIP or the final output RIP. If the job is set to the final output RIP modules, after the job is ripped the EWF Plate Selector module analyzes the plate size and routes the job to the appropriate input folder of our CTP device.

For example, if we want a color job, named "ABC.PDF" to go on coated paper at 175 lpi on our Komori press. All we need to do is change our job name to "ABD-C-C-175.pdf" and EWF will process this job according to to these instructions.

Rules 2.png

File Distribute is one of over 50 modules available on EWF 3. To activate File Distribute on your EWF or to learn more about it, contact Compose or your Compose dealer. If you have an earlier version of EWF, now it's the time to upgrade. Support rates for configuring your workflow will apply. Click on the image below to see it larger.